
Roles & Seats | Zeo Route Planner
Fleet Platform

Role-Based Access Control
Built for Growing Fleets

Give every user exactly the access they need — no more, no less — with
three clearly defined roles, a simple Add User flow, and a seat
management process split into three unambiguous steps.
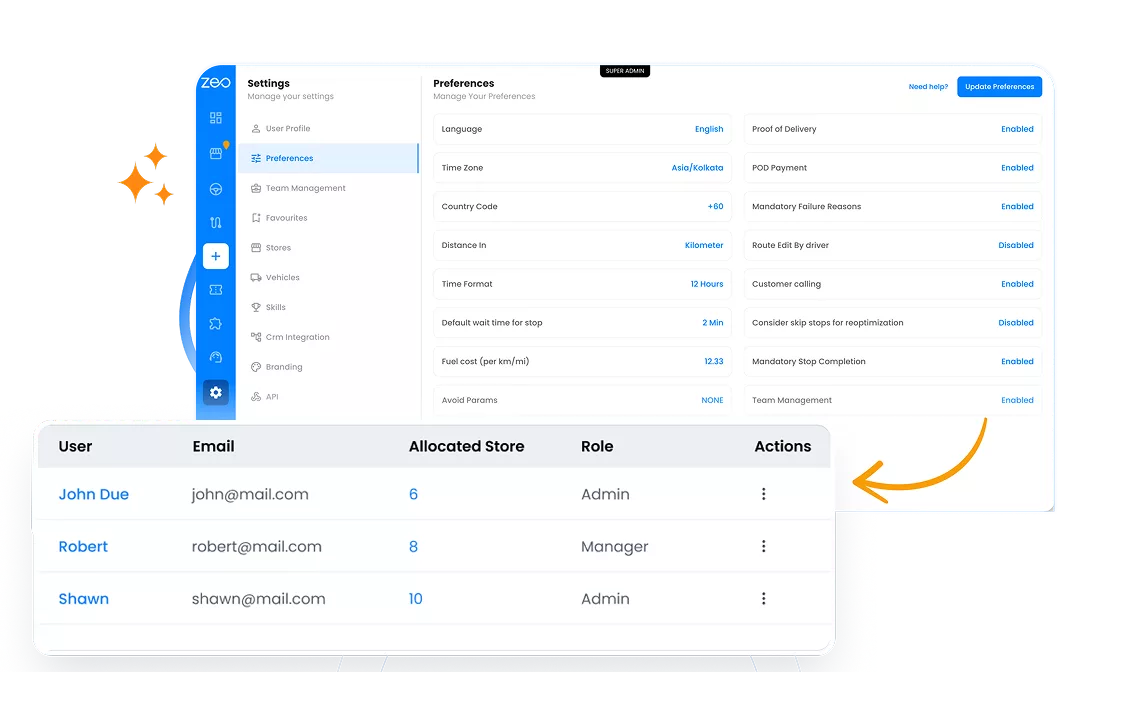
Zeo Preferences and Team Management screen showing roles, users, and allocated stores
  • 2

    Pre-configured permission roles

  • 3

    Steps to assign and manage access easily

  • 2

    Core roles that scale across stores and drivers

Two Roles, Explicit Permissions

Focus on what you do best. Assign clear, role-based access to keep
your team focused, secure, and aligned with your business goals.

Admin

Oversees one or multiple stores assigned by the Admin.

  • Manage Routes & Operations — Plan routes, assign drivers, track operations, and manage fleet activities.
  • Full Platform Access — Access reports, analytics, and all platform features.

Store Manager

Manages one assigned store, overseeing its daily operations,
drivers, routes, and team activities.

  • Manage Assigned Store — Oversee daily operations and
    manage activities within assigned stores.

  • Manage Routes & Operations — Create, assign, and
    manage routes for drivers within assigned stores.

  • View Store Reports — Access store-level reports and
    analytics to monitor performance and operations.

Adding a New Team Member

The Add User flow — Name, Email, User Role, and
Assign Store — is the same modal a Super Admin uses every time.

1

Open Add User

From Team Management, click “Add” to open the user creation modal

2

Fill Name, Email & Role

Enter name, a required email, and choose Admin or Store Manager

3

Assign Store(s)

Select one or more stores this user should have access to

4

Create User

An automated welcome email is sent with login details and a password setup link

Seat Management,
Split Into Three Clean Steps

Buying, allocating, and assigning seats are three separate actions — so nobody has to guess who does what.

DELIVERY

1. Buy Seats

Select and purchase the right number of seats for your team. You can always scale up or adjust later based on actual usage and business needs.

DELIVERY

2. Assign Drivers to Seats

Once the seat count is set, assign it directly to individual drivers. This ensures every driver has a valid seat and is ready to start using the app without delays.

Ad-Hoc Access vs.
Role-Based Control

See the difference a proper multi-store structure makes as you grow.

No, Zeo Route Planner
Ad-Hoc Access

  • Everyone often ends up with full access
  • No separation between roles and responsibilities
  • Seat purchases, allocation, and assignment are tangled together
  • No visibility into who requested more seats or why
  • Role changes require manually re-explaining permissions

Yes, Zeo Route Planner
Zeo Multi-Level Hierarchy

  • Role-based access with clear permissions
  • Separate Admin and Store Manager roles
  • Buying, allocating, andigning seats are three distinct steps
  • Role changes automatically email the user with their new access

How Fleets Use Roles
& Seat Management

Real use cases from small to mid-sized fleets on ZEO.

DELIVERY

Right Drivers, Right Store

Admins can centrally manage drivers and seats across the fleet, assigning them to specific stores so Store Managers have clear visibility into the drivers available for their store.

FIELD SERVICE

Simplified Seat Management

A growing field service operation streamlined team management by giving Admins centralized control to purchase and assign seats across stores — making it easier to organize teams as the business expands.

Zeo Questionnaire

Frequently
Asked
Questions

Know More

How do I add stop by typing and searching? Web

Follow these steps to add a stop by typing and searching:

  • Go to Playground Page. You will find a search box in top left.
  • Type in your desired stop and it will show search results as you type.
  • Select one of the search results to add the stop to list of unassigned stops.

How do I import stops in bulk from an excel file? Web

Follow these steps to add stops in bulk using an excel file:

  • Go to Playground Page.
  • In top right corner you will see import icon. Press on that icon & a modal will open.
  • If you already have an excel file, press the "Upload stops via flat file" button & a new window will open up.
  • If you don't have an existing file, you can download a sample file and input all your data accordingly, then upload it.
  • In the new window, upload your file and match the headers & confirm mappings.
  • Review your confirmed data and add the stop.

How do I import stops from an image? Mobile

Follow these steps to add stops in bulk by uploading an image:

  • Go to Zeo Route Planner App and open On Ride page.
  • Bottom bar has 3 icons in left. Press on image icon.
  • Select the image from gallery if you already have one or take a picture if you don't have existing.
  • Adjust the crop for the selected image & press crop.
  • Zeo will automatically detect the addresses from the image. Press on done and then save & optimize to create route.

How do I add a stop using Latitude and Longitude? Mobile

Follow these steps to add stop if you have Latitude & Longitude of the address:

  • Go to Zeo Route Planner App and open On Ride page.
  • You will see a icon. Press on that icon & press on New Route.
  • If you already have an excel file, press the "Upload stops via flat file" button & a new window will open up.
  • Below search bar, select the "by lat long" option and then enter the latitude and longitude in the search bar.
  • You will see results in the search, select one of them.
  • Select additional options according to your need & click on "Done adding stops".

How do I add stops using QR Code? Mobile

Follow these steps to add stop using QR Code:

  • Go to Zeo Route Planner App and open On Ride page.
  • You will see a icon. Press on that icon & press on New Route.
  • Bottom bar has 3 icons in left. Press on QR code icon.
  • It will open up a QR Code scanner. You can scan a normal QR code as well as a FedEx QR code, and it will automatically detect the address.
  • Add the stop to route with any additional options.

How do I delete a stop? Mobile

Follow these steps to delete a stop:

  • Go to Zeo Route Planner App and open On Ride page.
  • You will see a icon. Press on that icon & press on New Route.
  • Add some stops using any of the methods & click on Save & Optimize.
  • From the list of stops that you have, long press on any stop that you want to delete.
  • It will open window asking you to select the stops that you want to remove. Click on Remove button and it will delete the stop from your route.

Zeo Blogs

Explore our blog for insightful articles, expert advice, and inspiring content that keeps you informed.

Delivery Optimization Success Stories: Real Fleet Results

Real delivery optimization success stories with verified KPIs by fleet size and industry, plus an ROI calculator to estimate your own savings.

Route Optimization Case Studies: Real SMB Results (2026)

Real route optimization case studies from small delivery and field service businesses—actual costs, timelines, and ROI. See what

How to Plan Propane Delivery Routes During Peak Season

Learn how to plan propane delivery routes during peak season with a week-by-week playbook, KPI checklist, and route optimization tips for winter demand.

Xlork is a developer-first data import platform. It lets you embed CSV, Excel, and Google Sheets import into any app with AI-powered column mapping and schema validation. Explore free developer tools like JSON-to-CSV converters and color palette generators. No more building import flows from scratch — just drop in the Xlork SDK, sign up free, and ship clean data in minutes.