Updated on: April 18, 2025
Zeo Route Planner provides various settings that the drivers or the delivery partner require while they are out in the field for delivery. We understand that the drivers should also have some features that they can use to ease delivery.
Let’s look into a few of such settings/features that are tailored for drivers.
Add/Delete new stops on the go
While delivering the drivers can add or delete the stops, let’s see how to do that.
Adding new stops
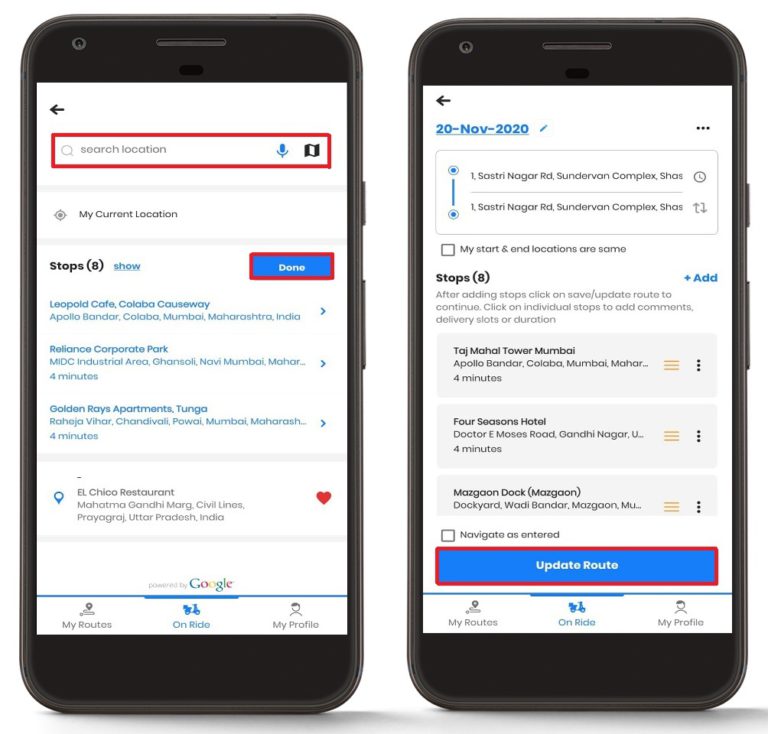
- Navigate to the “On Ride” section, and you can see all the routes entered. If there are no routes, then you can create your routes.
- You can see a “+” button. Click on the button, and you will see a list of options.
- Click on the “Edit Route” and then click on the “+Add” button.
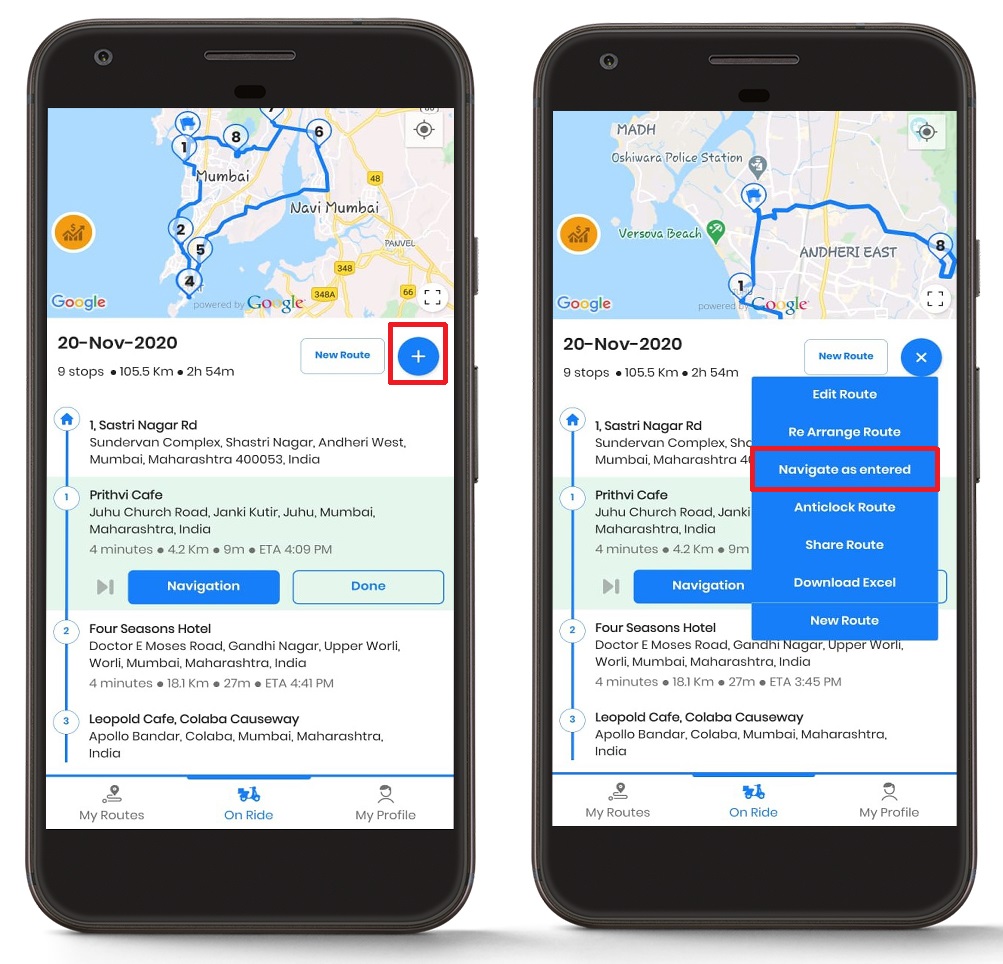
- In the search box, type the address you want, and then click on the “Done” button.
- Then click on the “Update Route” button, and the route will be updated.
Deleting stops on the go
Suppose one needs to delete the stop while delivering the products; let’s see how one can delete the stops.
- Navigate to the “On Ride” section, and you can see all the routes that have been entered. If there are no routes, then you can create your routes.
- You can see a “+” button. Click on the button and you will see a list of options.
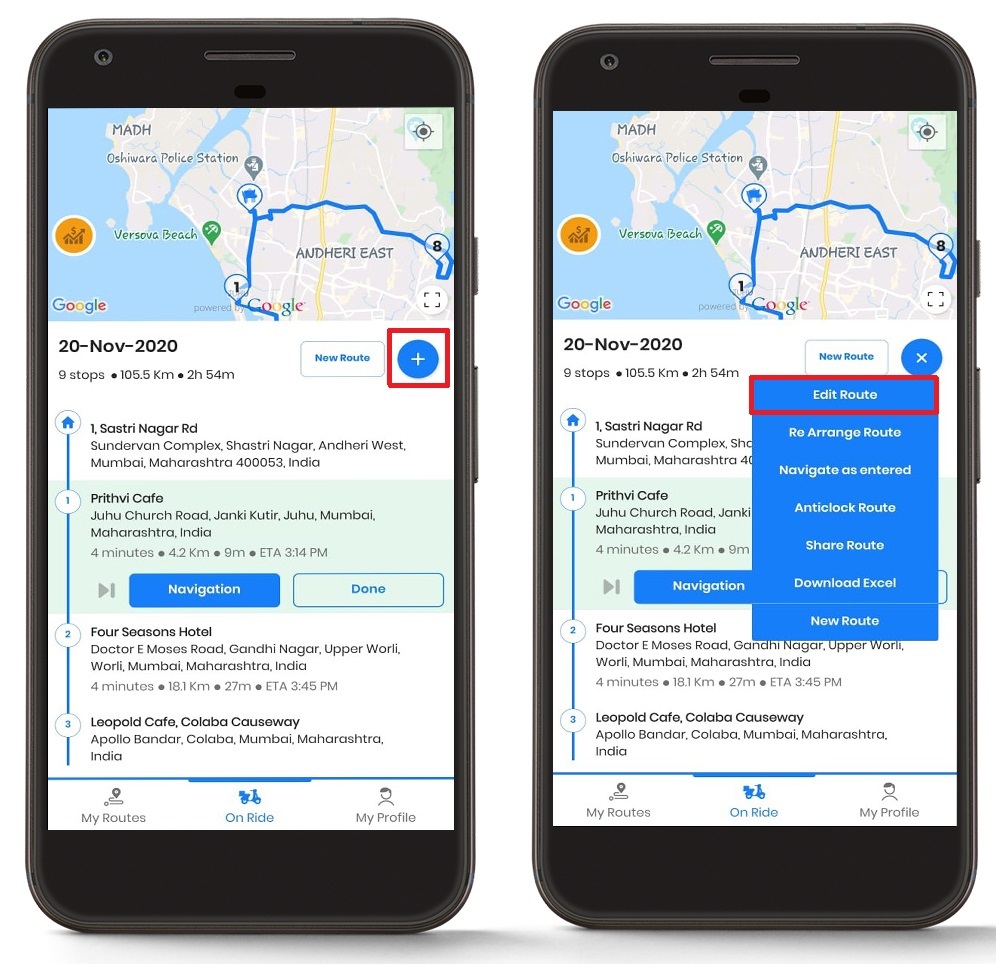
- Click on the “Edit Route” button, and you will see a list of routes you have created.
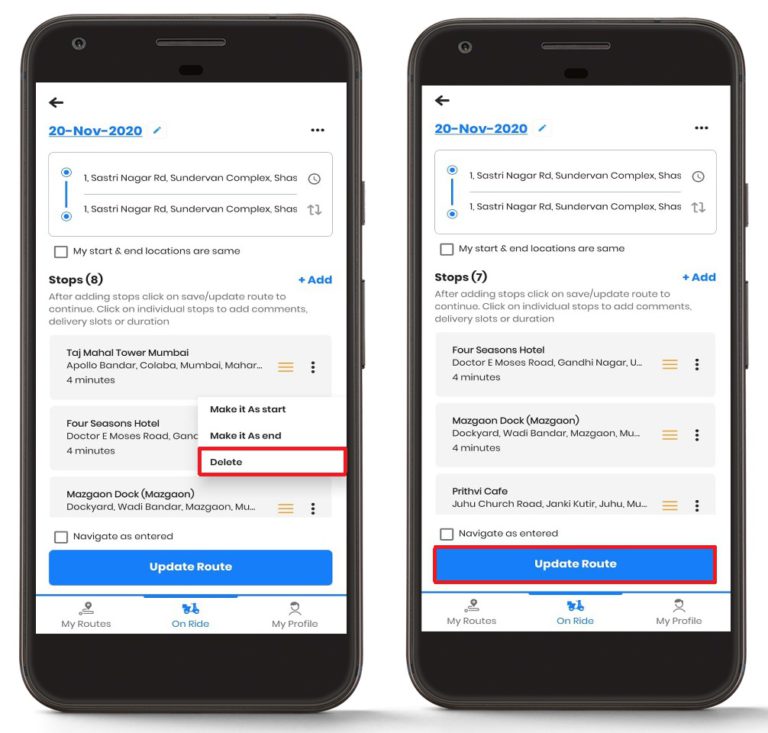
- Click on the dots in front of the route which you want to delete.
- You will get the option “Delete.”
- After the option, click on the “Update Route” to finalize the changes.
Skip stops and re-arrange routes
A driver can skip a stop if the customer is not available, and it helps the driver keep their work on with the delivery of other customers; let’s see how you can do that.
- Go on to the “On Ride” tab, and there you can see a “Skip” button just before the “Navigation” button. By pressing the button, the stop will be skipped, but it will not be completed.
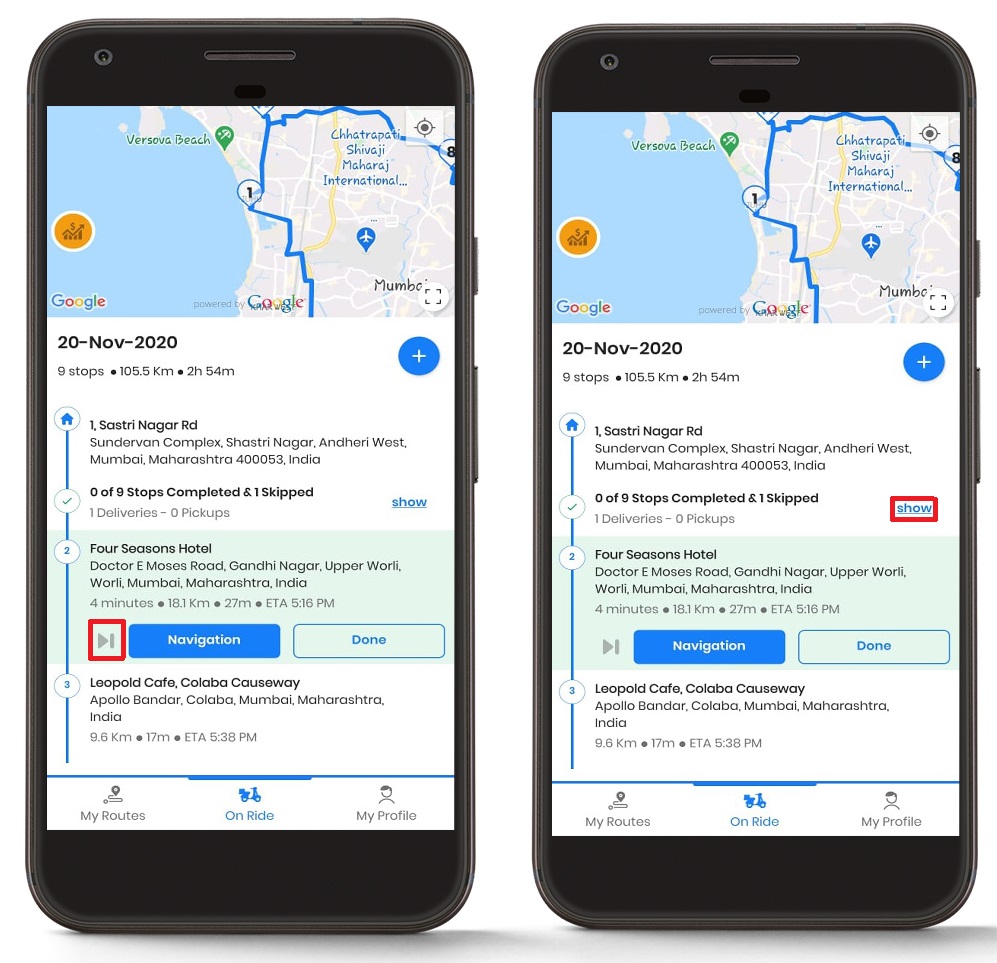
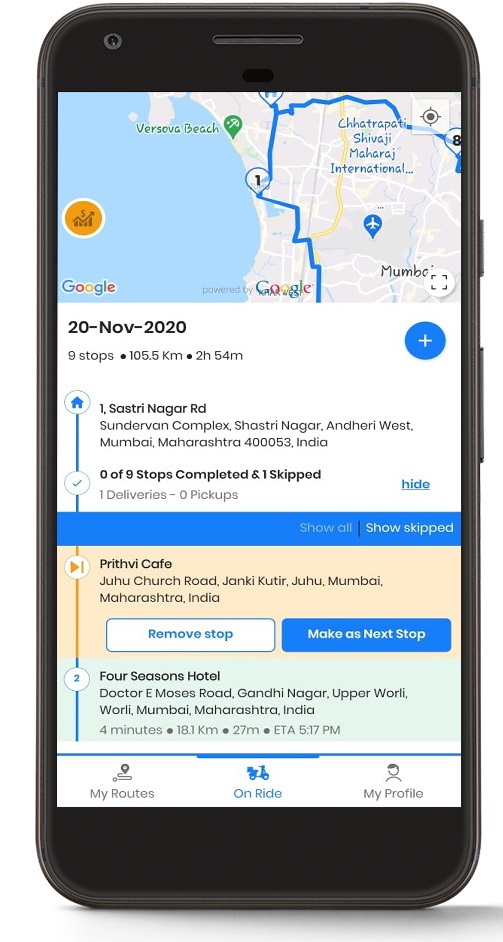
- To see the skipped stop, press on the “Show” button, and from there, you can perform the required action for the skipped stop.
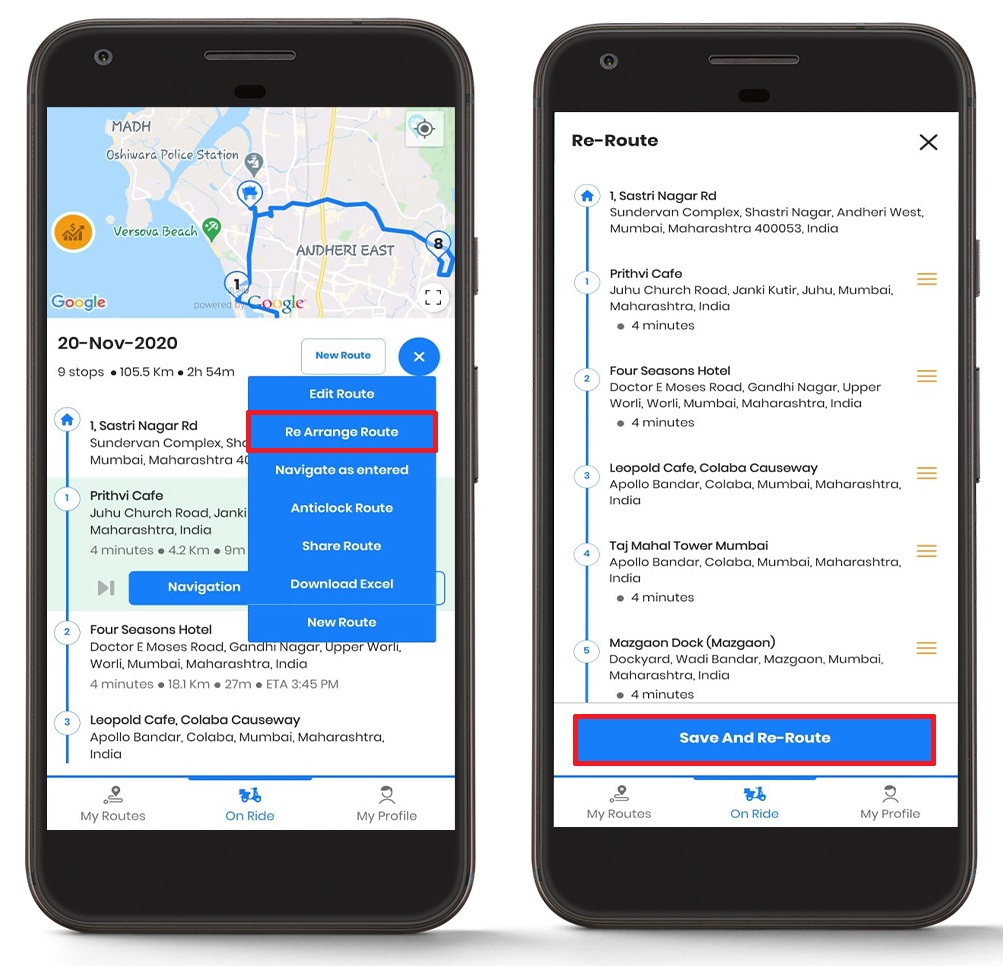
- Re-arrange the route, press on the “+” button, and press the “Re-Arrange Route” button.
- Then you can rearrange the route and press the “Save and Re-Route” button to save the changes.
Applying the navigate as entered setting
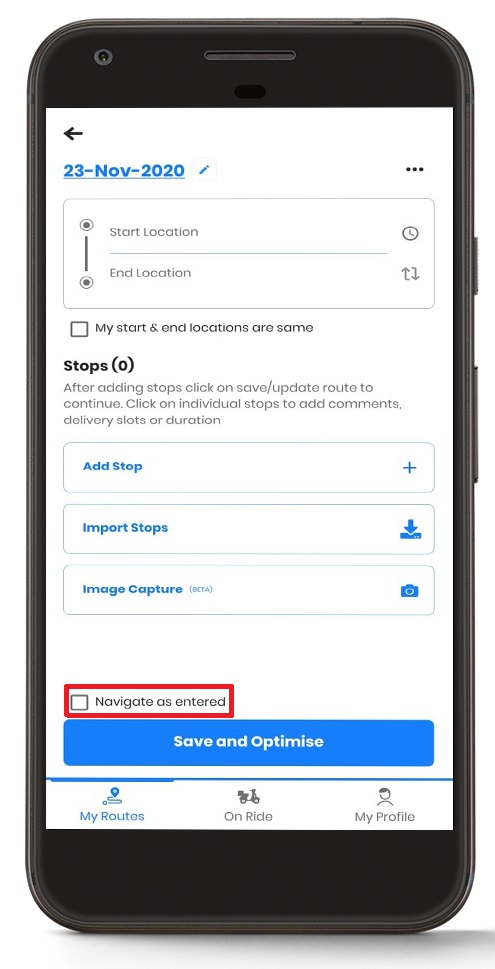
It often happens that drivers want to proceed the way they think will be best or according to the list of addresses from the office. For that case, Zeo Route provides the “Navigate as Entered” feature, which navigates you according to the addresses’ list as they are entered in the app.

increase fuel savings
Save 2 Hours on Deliveries, Everyday!
Optimize routes with our algorithm, reducing travel time and costs efficiently.
Get Started for Free
Follow these simple steps to apply the navigate as entered setting:
- You can check the “Navigate as Entered” checkbox while you are adding the stops. This will start the navigation in the way you have entered.
- If you are on the “On Ride” section then press on the “+” button and a list of details will be displayed.

- After that, press on the “Navigate as Entered” option, and the navigation will be provided in the order in which you have entered.
- Please note here that this option will not provide the optimized routes, which is not recommended.
Increase/Decrease the size of the map on the travel page
You can also increase or decrease the size of the map on the travel page. Zeo Route provides a straightforward option to increase or decrease the map size; let’s see how this process can be done.
- Navigate to the “On Ride” section, and you will see a map.
- At the bottom right of the map screen, you will see a square box.
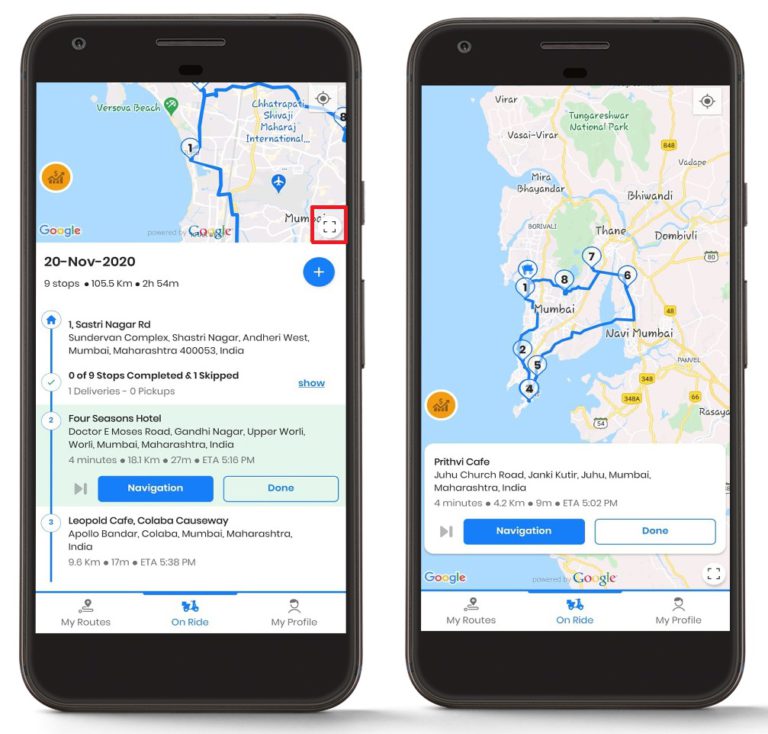
- Press on the square box to increase the size of the map to full screen.
- If pressed again, then it will decrease the size of the map.
Still need help?
Contact us by writing to our team at support@zeoauto.com, and our team will reach out to you.
Are you a fleet owner?
Want to manage your drivers and deliveries easily?
Grow your business effortlessly with Zeo Routes Planner – optimize routes and manage multiple drivers with ease.

increase fuel savings
Save 2 Hours on Deliveries, Everyday!
Optimize routes with our algorithm, reducing travel time and costs efficiently.
Get Started for Free


