Adding the current location as a stop
You can also add your current location as a stop in the Zeo Route Planner.
Follow these simple steps to add current location as a stop:
- Navigate to the “One Ride” section and press on the “+Add” button.
- You will now see a screen displaying various options. You will notice “My Current Location” just under the search text box.
- Press on the “My Current Location” button, and this will add the current location as a stop.
- After selecting the button, you will see that the stop has been added to the “Stops” list.
- Press the “Done” button to finalize the stop’s addition, and the stop will be displayed on the main route screen.
Adding stop details
Zeo Route Planner allows you to add additional details for your stops after adding them for navigation. These additions include stop type, delivery priority, duration, delivery slot, and customer details.
Let’s see how these additions can be made in the stops.
Adding customer details
You can add the customer details such as customer name, customer mobile, and customer email.
Follow these simple steps to add customer details:
- Navigate to the “One Ride” section, and under the “Stops” section, press on the stop on which you would like to add the details.
- You will see a list of details that you can edit.
- Under the “Customer Name,” add the name of the customer.
- You can add the mobile number of the customer under the “Customer Mobile” section.
- Also, you can provide the email of the customer under the “Customer Email” section.
- Once done with the addition, press the “Update Stop” button to update all the details.
Adding stop type
You can also change the stop type depending upon the requirement.
Follow these simple steps to add stop type in the app:
- Navigate to the “One Ride” section, and under the “Stops” section, press on the stop on which you would like to add the details.
- You will see a list of details that you can edit.
- Press on the “Stop Type” button, and you can choose “Delivery” or “Pickup” based according to your need.
- After selecting the Stop Type, press on the “Update Stop” button to update all the changes.
Adding delivery priority
You can add the delivery priority to your stops.
Follow these simple steps to add delivery priority in the app:
- Navigate to the “One Ride” section, and under the “Stops” section, press on the stop on which you would like to add the details.
- You will see a list of details that you can edit.
- Press on the “Delivery Priority” button, and you can choose “Normal” or “ASAP” based according to your need.
- After selecting the Delivery Priority, press on the “Update Stop” button to update all the changes.
Changing delivery slot
You can change the delivery slot based upon your need as well as in accordance with your customer.
Follow these simple steps to change the delivery slot in the app:
- Navigate to the “One Ride” section, and under the “Stops” section, press on the stop on which you would like to add the details.
- You will see a list of details that you can edit.
- Press on the “Delivery Slot” button and enter “Start” and “End” time based according to your need.
- After selecting the Delivery Slot, press on the “Update Stop” button to update all the changes.
Changing stop duration
You can also change the stop duration. Stop duration basically tells how much time one will spend on a particular stop.
Follow these simple steps to alter stop duration in the app:
- Navigate to the “One Ride” section, and under the “Stops” section, press on the stop on which you would like to add the details.
- You will see a list of details that you can edit.
- Press on the “Stop Duration” button and enter the time duration based according to your need.
- After entering the Stop Duration, press on the “Update Stop” button to update all the changes.
Still need help?
Contact us by writing to our team at support@zeoauto.com, and our team will reach out to you.
Making stops as favorites
If you are frequently visiting any particular stop, you can add it to your favorites in the Zeo Route Planner app to be easier for you to select it whenever you are visiting that place next shortly.
Follow these simple steps to make stops as favorites:
- Navigate to the “One Ride” section and press on the “+Add” button.
- You will now see a screen displaying various options. You will notice a search box. Type the address in the search box, and look out for the desired address.
- You will notice a small “Heart” symbol at the right end of each address.
- Please press on the symbol, and its color changes from grey to red, which marks it as your favorite address in the list.
Adding the current location as a stop
You can also add your current location as a stop in the Zeo Route Planner.
Follow these simple steps to add current location as a stop:
- Navigate to the “One Ride” section and press on the “+Add” button.
- You will now see a screen displaying various options. You will notice “My Current Location” just under the search text box.
- Press on the “My Current Location” button, and this will add the current location as a stop.
- After selecting the button, you will see that the stop has been added to the “Stops” list.
- Press the “Done” button to finalize the stop’s addition, and the stop will be displayed on the main route screen.
Adding stop details
Zeo Route Planner allows you to add additional details for your stops after adding them for navigation. These additions include stop type, delivery priority, duration, delivery slot, and customer details.
Let’s see how these additions can be made in the stops.
Adding customer details
You can add the customer details such as customer name, customer mobile, and customer email.
Follow these simple steps to add customer details:
- Navigate to the “One Ride” section, and under the “Stops” section, press on the stop on which you would like to add the details.
- You will see a list of details that you can edit.
- Under the “Customer Name,” add the name of the customer.
- You can add the mobile number of the customer under the “Customer Mobile” section.
- Also, you can provide the email of the customer under the “Customer Email” section.
- Once done with the addition, press the “Update Stop” button to update all the details.
Adding stop type
You can also change the stop type depending upon the requirement.
Follow these simple steps to add stop type in the app:
- Navigate to the “One Ride” section, and under the “Stops” section, press on the stop on which you would like to add the details.
- You will see a list of details that you can edit.
- Press on the “Stop Type” button, and you can choose “Delivery” or “Pickup” based according to your need.
- After selecting the Stop Type, press on the “Update Stop” button to update all the changes.
Adding delivery priority
You can add the delivery priority to your stops.
Follow these simple steps to add delivery priority in the app:
- Navigate to the “One Ride” section, and under the “Stops” section, press on the stop on which you would like to add the details.
- You will see a list of details that you can edit.
- Press on the “Delivery Priority” button, and you can choose “Normal” or “ASAP” based according to your need.
- After selecting the Delivery Priority, press on the “Update Stop” button to update all the changes.
Changing delivery slot
You can change the delivery slot based upon your need as well as in accordance with your customer.
Follow these simple steps to change the delivery slot in the app:
- Navigate to the “One Ride” section, and under the “Stops” section, press on the stop on which you would like to add the details.
- You will see a list of details that you can edit.
- Press on the “Delivery Slot” button and enter “Start” and “End” time based according to your need.
- After selecting the Delivery Slot, press on the “Update Stop” button to update all the changes.
Changing stop duration
You can also change the stop duration. Stop duration basically tells how much time one will spend on a particular stop.
Follow these simple steps to alter stop duration in the app:
- Navigate to the “One Ride” section, and under the “Stops” section, press on the stop on which you would like to add the details.
- You will see a list of details that you can edit.
- Press on the “Stop Duration” button and enter the time duration based according to your need.
- After entering the Stop Duration, press on the “Update Stop” button to update all the changes.
Still need help?
Contact us by writing to our team at support@zeoauto.com, and our team will reach out to you.
- Move the pin and drop it to the desired address. After dropping the pin, press the “Add Stop” button. You can also use the “Search Location” tab to find your location even more accurately.
- After selecting your stop, you will see that the stop has been added to the “Stops” list.
- Press the “Done” button to finalize the stop’s addition, and the stop will be displayed on the main route screen.
Making stops as favorites
If you are frequently visiting any particular stop, you can add it to your favorites in the Zeo Route Planner app to be easier for you to select it whenever you are visiting that place next shortly.
Follow these simple steps to make stops as favorites:
- Navigate to the “One Ride” section and press on the “+Add” button.
- You will now see a screen displaying various options. You will notice a search box. Type the address in the search box, and look out for the desired address.
- You will notice a small “Heart” symbol at the right end of each address.
- Please press on the symbol, and its color changes from grey to red, which marks it as your favorite address in the list.
Adding the current location as a stop
You can also add your current location as a stop in the Zeo Route Planner.
Follow these simple steps to add current location as a stop:
- Navigate to the “One Ride” section and press on the “+Add” button.
- You will now see a screen displaying various options. You will notice “My Current Location” just under the search text box.
- Press on the “My Current Location” button, and this will add the current location as a stop.
- After selecting the button, you will see that the stop has been added to the “Stops” list.
- Press the “Done” button to finalize the stop’s addition, and the stop will be displayed on the main route screen.
Adding stop details
Zeo Route Planner allows you to add additional details for your stops after adding them for navigation. These additions include stop type, delivery priority, duration, delivery slot, and customer details.
Let’s see how these additions can be made in the stops.
Adding customer details
You can add the customer details such as customer name, customer mobile, and customer email.
Follow these simple steps to add customer details:
- Navigate to the “One Ride” section, and under the “Stops” section, press on the stop on which you would like to add the details.
- You will see a list of details that you can edit.
- Under the “Customer Name,” add the name of the customer.
- You can add the mobile number of the customer under the “Customer Mobile” section.
- Also, you can provide the email of the customer under the “Customer Email” section.
- Once done with the addition, press the “Update Stop” button to update all the details.
Adding stop type
You can also change the stop type depending upon the requirement.
Follow these simple steps to add stop type in the app:
- Navigate to the “One Ride” section, and under the “Stops” section, press on the stop on which you would like to add the details.
- You will see a list of details that you can edit.
- Press on the “Stop Type” button, and you can choose “Delivery” or “Pickup” based according to your need.
- After selecting the Stop Type, press on the “Update Stop” button to update all the changes.
Adding delivery priority
You can add the delivery priority to your stops.
Follow these simple steps to add delivery priority in the app:
- Navigate to the “One Ride” section, and under the “Stops” section, press on the stop on which you would like to add the details.
- You will see a list of details that you can edit.
- Press on the “Delivery Priority” button, and you can choose “Normal” or “ASAP” based according to your need.
- After selecting the Delivery Priority, press on the “Update Stop” button to update all the changes.
Changing delivery slot
You can change the delivery slot based upon your need as well as in accordance with your customer.
Follow these simple steps to change the delivery slot in the app:
- Navigate to the “One Ride” section, and under the “Stops” section, press on the stop on which you would like to add the details.
- You will see a list of details that you can edit.
- Press on the “Delivery Slot” button and enter “Start” and “End” time based according to your need.
- After selecting the Delivery Slot, press on the “Update Stop” button to update all the changes.
Changing stop duration
You can also change the stop duration. Stop duration basically tells how much time one will spend on a particular stop.
Follow these simple steps to alter stop duration in the app:
- Navigate to the “One Ride” section, and under the “Stops” section, press on the stop on which you would like to add the details.
- You will see a list of details that you can edit.
- Press on the “Stop Duration” button and enter the time duration based according to your need.
- After entering the Stop Duration, press on the “Update Stop” button to update all the changes.
Still need help?
Contact us by writing to our team at support@zeoauto.com, and our team will reach out to you.
Adding stops using pin drop on maps
You can also stop using pin drop on maps.
Follow these simple steps to add stop using pin drop on maps:
- Navigate to the “One Ride” section and press on the “+Add” button.
- You will now see a screen displaying various options. You will notice a search box. On the right hand, you will notice a map option just beside the microphone icon.
- Press the map icon, and an embedded map will open up.
- Move the pin and drop it to the desired address. After dropping the pin, press the “Add Stop” button. You can also use the “Search Location” tab to find your location even more accurately.
- After selecting your stop, you will see that the stop has been added to the “Stops” list.
- Press the “Done” button to finalize the stop’s addition, and the stop will be displayed on the main route screen.
Making stops as favorites
If you are frequently visiting any particular stop, you can add it to your favorites in the Zeo Route Planner app to be easier for you to select it whenever you are visiting that place next shortly.
Follow these simple steps to make stops as favorites:
- Navigate to the “One Ride” section and press on the “+Add” button.
- You will now see a screen displaying various options. You will notice a search box. Type the address in the search box, and look out for the desired address.
- You will notice a small “Heart” symbol at the right end of each address.
- Please press on the symbol, and its color changes from grey to red, which marks it as your favorite address in the list.
Adding the current location as a stop
You can also add your current location as a stop in the Zeo Route Planner.
Follow these simple steps to add current location as a stop:
- Navigate to the “One Ride” section and press on the “+Add” button.
- You will now see a screen displaying various options. You will notice “My Current Location” just under the search text box.
- Press on the “My Current Location” button, and this will add the current location as a stop.
- After selecting the button, you will see that the stop has been added to the “Stops” list.
- Press the “Done” button to finalize the stop’s addition, and the stop will be displayed on the main route screen.
Adding stop details
Zeo Route Planner allows you to add additional details for your stops after adding them for navigation. These additions include stop type, delivery priority, duration, delivery slot, and customer details.
Let’s see how these additions can be made in the stops.
Adding customer details
You can add the customer details such as customer name, customer mobile, and customer email.
Follow these simple steps to add customer details:
- Navigate to the “One Ride” section, and under the “Stops” section, press on the stop on which you would like to add the details.
- You will see a list of details that you can edit.
- Under the “Customer Name,” add the name of the customer.
- You can add the mobile number of the customer under the “Customer Mobile” section.
- Also, you can provide the email of the customer under the “Customer Email” section.
- Once done with the addition, press the “Update Stop” button to update all the details.
Adding stop type
You can also change the stop type depending upon the requirement.
Follow these simple steps to add stop type in the app:
- Navigate to the “One Ride” section, and under the “Stops” section, press on the stop on which you would like to add the details.
- You will see a list of details that you can edit.
- Press on the “Stop Type” button, and you can choose “Delivery” or “Pickup” based according to your need.
- After selecting the Stop Type, press on the “Update Stop” button to update all the changes.
Adding delivery priority
You can add the delivery priority to your stops.
Follow these simple steps to add delivery priority in the app:
- Navigate to the “One Ride” section, and under the “Stops” section, press on the stop on which you would like to add the details.
- You will see a list of details that you can edit.
- Press on the “Delivery Priority” button, and you can choose “Normal” or “ASAP” based according to your need.
- After selecting the Delivery Priority, press on the “Update Stop” button to update all the changes.
Changing delivery slot
You can change the delivery slot based upon your need as well as in accordance with your customer.
Follow these simple steps to change the delivery slot in the app:
- Navigate to the “One Ride” section, and under the “Stops” section, press on the stop on which you would like to add the details.
- You will see a list of details that you can edit.
- Press on the “Delivery Slot” button and enter “Start” and “End” time based according to your need.
- After selecting the Delivery Slot, press on the “Update Stop” button to update all the changes.
Changing stop duration
You can also change the stop duration. Stop duration basically tells how much time one will spend on a particular stop.
Follow these simple steps to alter stop duration in the app:
- Navigate to the “One Ride” section, and under the “Stops” section, press on the stop on which you would like to add the details.
- You will see a list of details that you can edit.
- Press on the “Stop Duration” button and enter the time duration based according to your need.
- After entering the Stop Duration, press on the “Update Stop” button to update all the changes.
Still need help?
Contact us by writing to our team at support@zeoauto.com, and our team will reach out to you.
- Speak the desired address, and you will see the list of addresses. Click on the desired address.
- After selecting your stop, you will see that the stop has been added to the “Stops” list.
- Press the “Done” button to finalize the stop’s addition, and the stop will be displayed on the main route screen.
Adding stops using pin drop on maps
You can also stop using pin drop on maps.
Follow these simple steps to add stop using pin drop on maps:
- Navigate to the “One Ride” section and press on the “+Add” button.
- You will now see a screen displaying various options. You will notice a search box. On the right hand, you will notice a map option just beside the microphone icon.
- Press the map icon, and an embedded map will open up.
- Move the pin and drop it to the desired address. After dropping the pin, press the “Add Stop” button. You can also use the “Search Location” tab to find your location even more accurately.
- After selecting your stop, you will see that the stop has been added to the “Stops” list.
- Press the “Done” button to finalize the stop’s addition, and the stop will be displayed on the main route screen.
Making stops as favorites
If you are frequently visiting any particular stop, you can add it to your favorites in the Zeo Route Planner app to be easier for you to select it whenever you are visiting that place next shortly.
Follow these simple steps to make stops as favorites:
- Navigate to the “One Ride” section and press on the “+Add” button.
- You will now see a screen displaying various options. You will notice a search box. Type the address in the search box, and look out for the desired address.
- You will notice a small “Heart” symbol at the right end of each address.
- Please press on the symbol, and its color changes from grey to red, which marks it as your favorite address in the list.
Adding the current location as a stop
You can also add your current location as a stop in the Zeo Route Planner.
Follow these simple steps to add current location as a stop:
- Navigate to the “One Ride” section and press on the “+Add” button.
- You will now see a screen displaying various options. You will notice “My Current Location” just under the search text box.
- Press on the “My Current Location” button, and this will add the current location as a stop.
- After selecting the button, you will see that the stop has been added to the “Stops” list.
- Press the “Done” button to finalize the stop’s addition, and the stop will be displayed on the main route screen.
Adding stop details
Zeo Route Planner allows you to add additional details for your stops after adding them for navigation. These additions include stop type, delivery priority, duration, delivery slot, and customer details.
Let’s see how these additions can be made in the stops.
Adding customer details
You can add the customer details such as customer name, customer mobile, and customer email.
Follow these simple steps to add customer details:
- Navigate to the “One Ride” section, and under the “Stops” section, press on the stop on which you would like to add the details.
- You will see a list of details that you can edit.
- Under the “Customer Name,” add the name of the customer.
- You can add the mobile number of the customer under the “Customer Mobile” section.
- Also, you can provide the email of the customer under the “Customer Email” section.
- Once done with the addition, press the “Update Stop” button to update all the details.
Adding stop type
You can also change the stop type depending upon the requirement.
Follow these simple steps to add stop type in the app:
- Navigate to the “One Ride” section, and under the “Stops” section, press on the stop on which you would like to add the details.
- You will see a list of details that you can edit.
- Press on the “Stop Type” button, and you can choose “Delivery” or “Pickup” based according to your need.
- After selecting the Stop Type, press on the “Update Stop” button to update all the changes.
Adding delivery priority
You can add the delivery priority to your stops.
Follow these simple steps to add delivery priority in the app:
- Navigate to the “One Ride” section, and under the “Stops” section, press on the stop on which you would like to add the details.
- You will see a list of details that you can edit.
- Press on the “Delivery Priority” button, and you can choose “Normal” or “ASAP” based according to your need.
- After selecting the Delivery Priority, press on the “Update Stop” button to update all the changes.
Changing delivery slot
You can change the delivery slot based upon your need as well as in accordance with your customer.
Follow these simple steps to change the delivery slot in the app:
- Navigate to the “One Ride” section, and under the “Stops” section, press on the stop on which you would like to add the details.
- You will see a list of details that you can edit.
- Press on the “Delivery Slot” button and enter “Start” and “End” time based according to your need.
- After selecting the Delivery Slot, press on the “Update Stop” button to update all the changes.
Changing stop duration
You can also change the stop duration. Stop duration basically tells how much time one will spend on a particular stop.
Follow these simple steps to alter stop duration in the app:
- Navigate to the “One Ride” section, and under the “Stops” section, press on the stop on which you would like to add the details.
- You will see a list of details that you can edit.
- Press on the “Stop Duration” button and enter the time duration based according to your need.
- After entering the Stop Duration, press on the “Update Stop” button to update all the changes.
Still need help?
Contact us by writing to our team at support@zeoauto.com, and our team will reach out to you.
Adding stops using voice search
You can also add the stops using the voice search. It is a straightforward and efficient method to add a stop.
Follow these simple steps to add stop using voice search:
- Navigate to the “One Ride” section and press on the “+Add” button.
- You will now see a screen displaying various options. You will notice a search box. On the right hand, you will notice a microphone option.
- Press the microphone icon, and the voice search will be active.
- Speak the desired address, and you will see the list of addresses. Click on the desired address.
- After selecting your stop, you will see that the stop has been added to the “Stops” list.
- Press the “Done” button to finalize the stop’s addition, and the stop will be displayed on the main route screen.
Adding stops using pin drop on maps
You can also stop using pin drop on maps.
Follow these simple steps to add stop using pin drop on maps:
- Navigate to the “One Ride” section and press on the “+Add” button.
- You will now see a screen displaying various options. You will notice a search box. On the right hand, you will notice a map option just beside the microphone icon.
- Press the map icon, and an embedded map will open up.
- Move the pin and drop it to the desired address. After dropping the pin, press the “Add Stop” button. You can also use the “Search Location” tab to find your location even more accurately.
- After selecting your stop, you will see that the stop has been added to the “Stops” list.
- Press the “Done” button to finalize the stop’s addition, and the stop will be displayed on the main route screen.
Making stops as favorites
If you are frequently visiting any particular stop, you can add it to your favorites in the Zeo Route Planner app to be easier for you to select it whenever you are visiting that place next shortly.
Follow these simple steps to make stops as favorites:
- Navigate to the “One Ride” section and press on the “+Add” button.
- You will now see a screen displaying various options. You will notice a search box. Type the address in the search box, and look out for the desired address.
- You will notice a small “Heart” symbol at the right end of each address.
- Please press on the symbol, and its color changes from grey to red, which marks it as your favorite address in the list.
Adding the current location as a stop
You can also add your current location as a stop in the Zeo Route Planner.
Follow these simple steps to add current location as a stop:
- Navigate to the “One Ride” section and press on the “+Add” button.
- You will now see a screen displaying various options. You will notice “My Current Location” just under the search text box.
- Press on the “My Current Location” button, and this will add the current location as a stop.
- After selecting the button, you will see that the stop has been added to the “Stops” list.
- Press the “Done” button to finalize the stop’s addition, and the stop will be displayed on the main route screen.
Adding stop details
Zeo Route Planner allows you to add additional details for your stops after adding them for navigation. These additions include stop type, delivery priority, duration, delivery slot, and customer details.
Let’s see how these additions can be made in the stops.
Adding customer details
You can add the customer details such as customer name, customer mobile, and customer email.
Follow these simple steps to add customer details:
- Navigate to the “One Ride” section, and under the “Stops” section, press on the stop on which you would like to add the details.
- You will see a list of details that you can edit.
- Under the “Customer Name,” add the name of the customer.
- You can add the mobile number of the customer under the “Customer Mobile” section.
- Also, you can provide the email of the customer under the “Customer Email” section.
- Once done with the addition, press the “Update Stop” button to update all the details.
Adding stop type
You can also change the stop type depending upon the requirement.
Follow these simple steps to add stop type in the app:
- Navigate to the “One Ride” section, and under the “Stops” section, press on the stop on which you would like to add the details.
- You will see a list of details that you can edit.
- Press on the “Stop Type” button, and you can choose “Delivery” or “Pickup” based according to your need.
- After selecting the Stop Type, press on the “Update Stop” button to update all the changes.
Adding delivery priority
You can add the delivery priority to your stops.
Follow these simple steps to add delivery priority in the app:
- Navigate to the “One Ride” section, and under the “Stops” section, press on the stop on which you would like to add the details.
- You will see a list of details that you can edit.
- Press on the “Delivery Priority” button, and you can choose “Normal” or “ASAP” based according to your need.
- After selecting the Delivery Priority, press on the “Update Stop” button to update all the changes.
Changing delivery slot
You can change the delivery slot based upon your need as well as in accordance with your customer.
Follow these simple steps to change the delivery slot in the app:
- Navigate to the “One Ride” section, and under the “Stops” section, press on the stop on which you would like to add the details.
- You will see a list of details that you can edit.
- Press on the “Delivery Slot” button and enter “Start” and “End” time based according to your need.
- After selecting the Delivery Slot, press on the “Update Stop” button to update all the changes.
Changing stop duration
You can also change the stop duration. Stop duration basically tells how much time one will spend on a particular stop.
Follow these simple steps to alter stop duration in the app:
- Navigate to the “One Ride” section, and under the “Stops” section, press on the stop on which you would like to add the details.
- You will see a list of details that you can edit.
- Press on the “Stop Duration” button and enter the time duration based according to your need.
- After entering the Stop Duration, press on the “Update Stop” button to update all the changes.
Still need help?
Contact us by writing to our team at support@zeoauto.com, and our team will reach out to you.
- After selecting your stop, you will see that the stop has been added to the “Stops” list.
- Press the “Done” button to finalize the stop’s addition, and the stop will be displayed on the main route screen.
Adding stops using voice search
You can also add the stops using the voice search. It is a straightforward and efficient method to add a stop.
Follow these simple steps to add stop using voice search:
- Navigate to the “One Ride” section and press on the “+Add” button.
- You will now see a screen displaying various options. You will notice a search box. On the right hand, you will notice a microphone option.
- Press the microphone icon, and the voice search will be active.
- Speak the desired address, and you will see the list of addresses. Click on the desired address.
- After selecting your stop, you will see that the stop has been added to the “Stops” list.
- Press the “Done” button to finalize the stop’s addition, and the stop will be displayed on the main route screen.
Adding stops using pin drop on maps
You can also stop using pin drop on maps.
Follow these simple steps to add stop using pin drop on maps:
- Navigate to the “One Ride” section and press on the “+Add” button.
- You will now see a screen displaying various options. You will notice a search box. On the right hand, you will notice a map option just beside the microphone icon.
- Press the map icon, and an embedded map will open up.
- Move the pin and drop it to the desired address. After dropping the pin, press the “Add Stop” button. You can also use the “Search Location” tab to find your location even more accurately.
- After selecting your stop, you will see that the stop has been added to the “Stops” list.
- Press the “Done” button to finalize the stop’s addition, and the stop will be displayed on the main route screen.
Making stops as favorites
If you are frequently visiting any particular stop, you can add it to your favorites in the Zeo Route Planner app to be easier for you to select it whenever you are visiting that place next shortly.
Follow these simple steps to make stops as favorites:
- Navigate to the “One Ride” section and press on the “+Add” button.
- You will now see a screen displaying various options. You will notice a search box. Type the address in the search box, and look out for the desired address.
- You will notice a small “Heart” symbol at the right end of each address.
- Please press on the symbol, and its color changes from grey to red, which marks it as your favorite address in the list.
Adding the current location as a stop
You can also add your current location as a stop in the Zeo Route Planner.
Follow these simple steps to add current location as a stop:
- Navigate to the “One Ride” section and press on the “+Add” button.
- You will now see a screen displaying various options. You will notice “My Current Location” just under the search text box.
- Press on the “My Current Location” button, and this will add the current location as a stop.
- After selecting the button, you will see that the stop has been added to the “Stops” list.
- Press the “Done” button to finalize the stop’s addition, and the stop will be displayed on the main route screen.
Adding stop details
Zeo Route Planner allows you to add additional details for your stops after adding them for navigation. These additions include stop type, delivery priority, duration, delivery slot, and customer details.
Let’s see how these additions can be made in the stops.
Adding customer details
You can add the customer details such as customer name, customer mobile, and customer email.
Follow these simple steps to add customer details:
- Navigate to the “One Ride” section, and under the “Stops” section, press on the stop on which you would like to add the details.
- You will see a list of details that you can edit.
- Under the “Customer Name,” add the name of the customer.
- You can add the mobile number of the customer under the “Customer Mobile” section.
- Also, you can provide the email of the customer under the “Customer Email” section.
- Once done with the addition, press the “Update Stop” button to update all the details.
Adding stop type
You can also change the stop type depending upon the requirement.
Follow these simple steps to add stop type in the app:
- Navigate to the “One Ride” section, and under the “Stops” section, press on the stop on which you would like to add the details.
- You will see a list of details that you can edit.
- Press on the “Stop Type” button, and you can choose “Delivery” or “Pickup” based according to your need.
- After selecting the Stop Type, press on the “Update Stop” button to update all the changes.
Adding delivery priority
You can add the delivery priority to your stops.
Follow these simple steps to add delivery priority in the app:
- Navigate to the “One Ride” section, and under the “Stops” section, press on the stop on which you would like to add the details.
- You will see a list of details that you can edit.
- Press on the “Delivery Priority” button, and you can choose “Normal” or “ASAP” based according to your need.
- After selecting the Delivery Priority, press on the “Update Stop” button to update all the changes.
Changing delivery slot
You can change the delivery slot based upon your need as well as in accordance with your customer.
Follow these simple steps to change the delivery slot in the app:
- Navigate to the “One Ride” section, and under the “Stops” section, press on the stop on which you would like to add the details.
- You will see a list of details that you can edit.
- Press on the “Delivery Slot” button and enter “Start” and “End” time based according to your need.
- After selecting the Delivery Slot, press on the “Update Stop” button to update all the changes.
Changing stop duration
You can also change the stop duration. Stop duration basically tells how much time one will spend on a particular stop.
Follow these simple steps to alter stop duration in the app:
- Navigate to the “One Ride” section, and under the “Stops” section, press on the stop on which you would like to add the details.
- You will see a list of details that you can edit.
- Press on the “Stop Duration” button and enter the time duration based according to your need.
- After entering the Stop Duration, press on the “Update Stop” button to update all the changes.
Still need help?
Contact us by writing to our team at support@zeoauto.com, and our team will reach out to you.
Adding stops using a text search
One can easily add a new stop by using the text search box provided in the app.
Follow these simple steps to add stop using text search:
- Navigate to the “One Ride” section and press on the “+Add” button.
- You will now see a screen displaying various options. You will notice a search box. You can enter the stop location in the box.
- After selecting your stop, you will see that the stop has been added to the “Stops” list.
- Press the “Done” button to finalize the stop’s addition, and the stop will be displayed on the main route screen.
Adding stops using voice search
You can also add the stops using the voice search. It is a straightforward and efficient method to add a stop.
Follow these simple steps to add stop using voice search:
- Navigate to the “One Ride” section and press on the “+Add” button.
- You will now see a screen displaying various options. You will notice a search box. On the right hand, you will notice a microphone option.
- Press the microphone icon, and the voice search will be active.
- Speak the desired address, and you will see the list of addresses. Click on the desired address.
- After selecting your stop, you will see that the stop has been added to the “Stops” list.
- Press the “Done” button to finalize the stop’s addition, and the stop will be displayed on the main route screen.
Adding stops using pin drop on maps
You can also stop using pin drop on maps.
Follow these simple steps to add stop using pin drop on maps:
- Navigate to the “One Ride” section and press on the “+Add” button.
- You will now see a screen displaying various options. You will notice a search box. On the right hand, you will notice a map option just beside the microphone icon.
- Press the map icon, and an embedded map will open up.
- Move the pin and drop it to the desired address. After dropping the pin, press the “Add Stop” button. You can also use the “Search Location” tab to find your location even more accurately.
- After selecting your stop, you will see that the stop has been added to the “Stops” list.
- Press the “Done” button to finalize the stop’s addition, and the stop will be displayed on the main route screen.
Making stops as favorites
If you are frequently visiting any particular stop, you can add it to your favorites in the Zeo Route Planner app to be easier for you to select it whenever you are visiting that place next shortly.
Follow these simple steps to make stops as favorites:
- Navigate to the “One Ride” section and press on the “+Add” button.
- You will now see a screen displaying various options. You will notice a search box. Type the address in the search box, and look out for the desired address.
- You will notice a small “Heart” symbol at the right end of each address.
- Please press on the symbol, and its color changes from grey to red, which marks it as your favorite address in the list.
Adding the current location as a stop
You can also add your current location as a stop in the Zeo Route Planner.
Follow these simple steps to add current location as a stop:
- Navigate to the “One Ride” section and press on the “+Add” button.
- You will now see a screen displaying various options. You will notice “My Current Location” just under the search text box.
- Press on the “My Current Location” button, and this will add the current location as a stop.
- After selecting the button, you will see that the stop has been added to the “Stops” list.
- Press the “Done” button to finalize the stop’s addition, and the stop will be displayed on the main route screen.
Adding stop details
Zeo Route Planner allows you to add additional details for your stops after adding them for navigation. These additions include stop type, delivery priority, duration, delivery slot, and customer details.
Let’s see how these additions can be made in the stops.
Adding customer details
You can add the customer details such as customer name, customer mobile, and customer email.
Follow these simple steps to add customer details:
- Navigate to the “One Ride” section, and under the “Stops” section, press on the stop on which you would like to add the details.
- You will see a list of details that you can edit.
- Under the “Customer Name,” add the name of the customer.
- You can add the mobile number of the customer under the “Customer Mobile” section.
- Also, you can provide the email of the customer under the “Customer Email” section.
- Once done with the addition, press the “Update Stop” button to update all the details.
Adding stop type
You can also change the stop type depending upon the requirement.
Follow these simple steps to add stop type in the app:
- Navigate to the “One Ride” section, and under the “Stops” section, press on the stop on which you would like to add the details.
- You will see a list of details that you can edit.
- Press on the “Stop Type” button, and you can choose “Delivery” or “Pickup” based according to your need.
- After selecting the Stop Type, press on the “Update Stop” button to update all the changes.
Adding delivery priority
You can add the delivery priority to your stops.
Follow these simple steps to add delivery priority in the app:
- Navigate to the “One Ride” section, and under the “Stops” section, press on the stop on which you would like to add the details.
- You will see a list of details that you can edit.
- Press on the “Delivery Priority” button, and you can choose “Normal” or “ASAP” based according to your need.
- After selecting the Delivery Priority, press on the “Update Stop” button to update all the changes.
Changing delivery slot
You can change the delivery slot based upon your need as well as in accordance with your customer.
Follow these simple steps to change the delivery slot in the app:
- Navigate to the “One Ride” section, and under the “Stops” section, press on the stop on which you would like to add the details.
- You will see a list of details that you can edit.
- Press on the “Delivery Slot” button and enter “Start” and “End” time based according to your need.
- After selecting the Delivery Slot, press on the “Update Stop” button to update all the changes.
Changing stop duration
You can also change the stop duration. Stop duration basically tells how much time one will spend on a particular stop.
Follow these simple steps to alter stop duration in the app:
- Navigate to the “One Ride” section, and under the “Stops” section, press on the stop on which you would like to add the details.
- You will see a list of details that you can edit.
- Press on the “Stop Duration” button and enter the time duration based according to your need.
- After entering the Stop Duration, press on the “Update Stop” button to update all the changes.
Still need help?
Contact us by writing to our team at support@zeoauto.com, and our team will reach out to you.
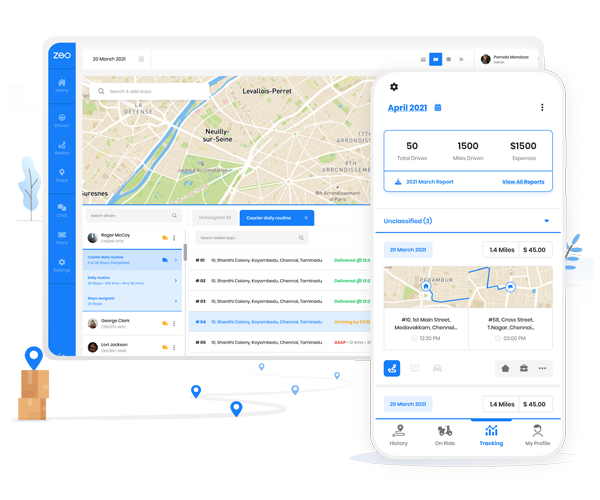
It sometimes happens that there is a need to add a new route while you are out on the roads. Thus, Zeo Route Planner has considered this problem and has introduced various features through which a new route can be created, and also one can manipulate the stop details after adding them. So, let’s see all the features in detail.
Adding stops using a text search
One can easily add a new stop by using the text search box provided in the app.
Follow these simple steps to add stop using text search:
- Navigate to the “One Ride” section and press on the “+Add” button.
- You will now see a screen displaying various options. You will notice a search box. You can enter the stop location in the box.
- After selecting your stop, you will see that the stop has been added to the “Stops” list.
- Press the “Done” button to finalize the stop’s addition, and the stop will be displayed on the main route screen.
Adding stops using voice search
You can also add the stops using the voice search. It is a straightforward and efficient method to add a stop.
Follow these simple steps to add stop using voice search:
- Navigate to the “One Ride” section and press on the “+Add” button.
- You will now see a screen displaying various options. You will notice a search box. On the right hand, you will notice a microphone option.
- Press the microphone icon, and the voice search will be active.
- Speak the desired address, and you will see the list of addresses. Click on the desired address.
- After selecting your stop, you will see that the stop has been added to the “Stops” list.
- Press the “Done” button to finalize the stop’s addition, and the stop will be displayed on the main route screen.
Adding stops using pin drop on maps
You can also stop using pin drop on maps.
Follow these simple steps to add stop using pin drop on maps:
- Navigate to the “One Ride” section and press on the “+Add” button.
- You will now see a screen displaying various options. You will notice a search box. On the right hand, you will notice a map option just beside the microphone icon.
- Press the map icon, and an embedded map will open up.
- Move the pin and drop it to the desired address. After dropping the pin, press the “Add Stop” button. You can also use the “Search Location” tab to find your location even more accurately.
- After selecting your stop, you will see that the stop has been added to the “Stops” list.
- Press the “Done” button to finalize the stop’s addition, and the stop will be displayed on the main route screen.
Making stops as favorites
If you are frequently visiting any particular stop, you can add it to your favorites in the Zeo Route Planner app to be easier for you to select it whenever you are visiting that place next shortly.
Follow these simple steps to make stops as favorites:
- Navigate to the “One Ride” section and press on the “+Add” button.
- You will now see a screen displaying various options. You will notice a search box. Type the address in the search box, and look out for the desired address.
- You will notice a small “Heart” symbol at the right end of each address.
- Please press on the symbol, and its color changes from grey to red, which marks it as your favorite address in the list.
Adding the current location as a stop
You can also add your current location as a stop in the Zeo Route Planner.
Follow these simple steps to add current location as a stop:
- Navigate to the “One Ride” section and press on the “+Add” button.
- You will now see a screen displaying various options. You will notice “My Current Location” just under the search text box.
- Press on the “My Current Location” button, and this will add the current location as a stop.
- After selecting the button, you will see that the stop has been added to the “Stops” list.
- Press the “Done” button to finalize the stop’s addition, and the stop will be displayed on the main route screen.
Adding stop details
Zeo Route Planner allows you to add additional details for your stops after adding them for navigation. These additions include stop type, delivery priority, duration, delivery slot, and customer details.
Let’s see how these additions can be made in the stops.
Adding customer details
You can add the customer details such as customer name, customer mobile, and customer email.
Follow these simple steps to add customer details:
- Navigate to the “One Ride” section, and under the “Stops” section, press on the stop on which you would like to add the details.
- You will see a list of details that you can edit.
- Under the “Customer Name,” add the name of the customer.
- You can add the mobile number of the customer under the “Customer Mobile” section.
- Also, you can provide the email of the customer under the “Customer Email” section.
- Once done with the addition, press the “Update Stop” button to update all the details.
Adding stop type
You can also change the stop type depending upon the requirement.
Follow these simple steps to add stop type in the app:
- Navigate to the “One Ride” section, and under the “Stops” section, press on the stop on which you would like to add the details.
- You will see a list of details that you can edit.
- Press on the “Stop Type” button, and you can choose “Delivery” or “Pickup” based according to your need.
- After selecting the Stop Type, press on the “Update Stop” button to update all the changes.
Adding delivery priority
You can add the delivery priority to your stops.
Follow these simple steps to add delivery priority in the app:
- Navigate to the “One Ride” section, and under the “Stops” section, press on the stop on which you would like to add the details.
- You will see a list of details that you can edit.
- Press on the “Delivery Priority” button, and you can choose “Normal” or “ASAP” based according to your need.
- After selecting the Delivery Priority, press on the “Update Stop” button to update all the changes.
Changing delivery slot
You can change the delivery slot based upon your need as well as in accordance with your customer.
Follow these simple steps to change the delivery slot in the app:
- Navigate to the “One Ride” section, and under the “Stops” section, press on the stop on which you would like to add the details.
- You will see a list of details that you can edit.
- Press on the “Delivery Slot” button and enter “Start” and “End” time based according to your need.
- After selecting the Delivery Slot, press on the “Update Stop” button to update all the changes.
Changing stop duration
You can also change the stop duration. Stop duration basically tells how much time one will spend on a particular stop.
Follow these simple steps to alter stop duration in the app:
- Navigate to the “One Ride” section, and under the “Stops” section, press on the stop on which you would like to add the details.
- You will see a list of details that you can edit.
- Press on the “Stop Duration” button and enter the time duration based according to your need.
- After entering the Stop Duration, press on the “Update Stop” button to update all the changes.
Still need help?
Contact us by writing to our team at support@zeoauto.com, and our team will reach out to you.